Kids Need Empathy
Kids Need Empathy
We wanted to design an immersive public-space experience that could teach empathy naturally through play.
Our target users were children ages 6 to 10, an age range where kids are beginning to understand abstract concepts, develop social reasoning, and practice self-directed skills. Instead of asking them to “learn empathy” directly, we designed a system where empathy emerged through making decisions for someone else.


Early research mapped developmental needs, empathy activities, and public-space play opportunities.
💡 Design Question - How might we help children consider other people’s needs through tangible, collaborative play?
Why City Building?
Why City Building?

Rejected: cooking game / mystery roleplay. Chosen: city-building because it made empathy spatial and collaborative
We explored cooking games, mystery narratives, role-playing activities, and “walk in someone else’s shoes” metaphors. City-building became the strongest direction because it naturally combined:
We explored cooking games, mystery narratives, role-playing activities, and “walk in someone else’s shoes” metaphors. City-building became the strongest direction because it naturally combined:
Perspective Taking - Residents have different needs and constraints
Perspective Taking - Residents have different needs and constraints
Agency - children make visible choices that affect the world
Agency - children make visible choices that affect the world
Collaboration - multiple players build, negotiate, and revise together
Collaboration - multiple players build, negotiate, and revise together
Physical Play - blocks create an intuitive, hands-on interaction
Physical Play - blocks create an intuitive, hands-on interaction
Open-Ended Problem Solving - there is no single correct solution
Open-Ended Problem Solving - there is no single correct solution
The city became a shared system where kids could ask questions like: Who needs this building? Who can reach it? What happens if we put it somewhere else?
The city became a shared system where kids could ask questions like: Who needs this building? Who can reach it? What happens if we put it somewhere else?
Gameplay
Gameplay
Players begin by choosing a fictional storyline, such as Atlantia, Knightingsdale, or Loaf-A-La Town. Each city has its own characters, setting, and building needs.
The basic loop:
Choose a storyline.
Meet resident characters.
Receive a building prompt.
Build on the physical board with sensor-equipped blocks.
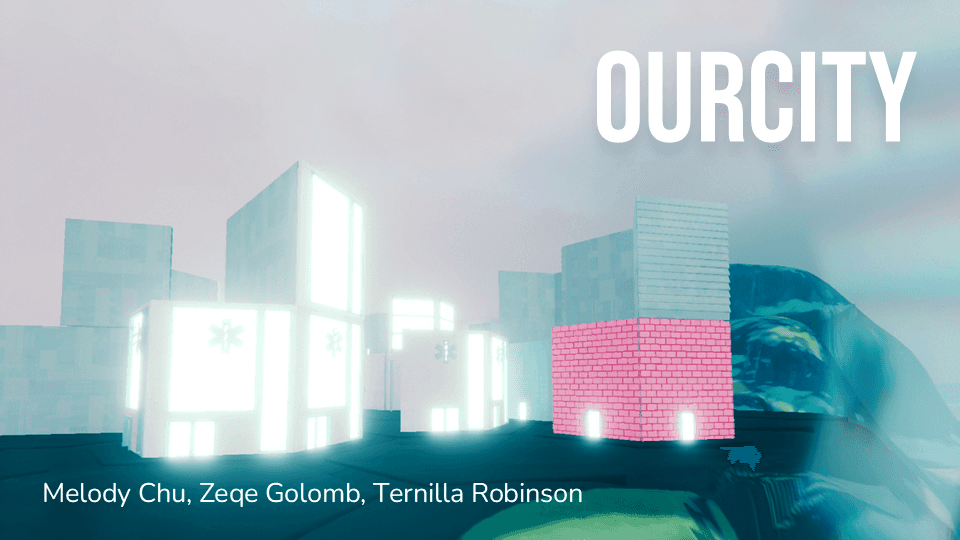
Watch the projected digital city update.
Receive character feedback.
Continue rebuilding the city with friends.
Example prompts include:
“Place a hospital near the senior center.”
“Make sure the power station is central to the city.”
“This building should be one floor so my grandma can get in.”
Instead of rewarding one “correct” placement, the game encourages children to explain their reasoning, respond to feedback, and compromise with other players.
Players begin by choosing a fictional storyline, such as Atlantia, Knightingsdale, or Loaf-A-La Town. Each city has its own characters, setting, and building needs.
The basic loop:
Choose a storyline.
Meet resident characters.
Receive a building prompt.
Build on the physical board with sensor-equipped blocks.
Watch the projected digital city update.
Receive character feedback.
Continue rebuilding the city with friends.
Example prompts include:
“Place a hospital near the senior center.”
“Make sure the power station is central to the city.”
“This building should be one floor so my grandma can get in.”
Instead of rewarding one “correct” placement, the game encourages children to explain their reasoning, respond to feedback, and compromise with other players.


My Role
I focused on making the physical-digital interaction actually work.
My responsibilities included:
Designing the resistor-based block detection system
Prototyping circuits in TinkerCAD and on physical breadboards
Selecting resistor values with distinguishable analog outputs
Writing Arduino logic to poll board zones and identify block types
Designing block geometry for stacking, grip, and electrical contact
Fabricating the board using layered acrylic and wood
Debugging loose contacts, soldering failures, and inconsistent readings
Collaborating with our Unity developer to send live board data into the projected world
This project sat exactly at the intersection I care about: playful interaction, physical prototyping, hardware logic, and human-centered design.
Technical System
OurCity uses passive, resistor-coded blocks to identify what children place on the board.
Each block contains a resistor and copper tape contacts. When a block is placed on the board, it completes a circuit and produces a unique analog value. The board reads that value, maps it to a building ID, and sends the data to Unity.
The key design decision was to keep the blocks passive. There are no batteries, microcontrollers, or powered electronics inside the blocks. That made them cheaper, safer, more durable, and easier for children to handle.
The system used:
Passive resistors and copper tape contacts inside each block
Contact-based analog sensing through the board surface
CD4051 multiplexers to poll multiple board zones
Arduino logic to convert analog readings into building IDs
Serial communication to Unity for projected feedback
Resistor chaining logic to support stacked block configurations
This allowed the physical board to behave like a tangible input device for a digital world.
Hardware Iteration
The biggest technical challenge was reliability. The first circuit worked, but the physical connection was fragile. Small shifts in copper tape placement, loose wiring, contact pressure, or resistor spacing could create inconsistent readings.
I iterated the hardware in several ways:
Contact reliability: Added lips and adjusted copper tape placement so blocks pressed more consistently against the board.
Resistor spacing: Chose resistor values that created clearer separation between analog readings.
Block geometry: Refined block size, grip, and stackability so children could build easily without accidentally breaking the electrical connection.
Board structure: Built the board as a layered system with a road pattern, detection surface, and electronics base.
Debugging: Rebuilt failed connections, adjusted soldering, and tested each zone modularly before integration.
Although we only fully wired one section of the final board, the detection architecture was designed to scale across the full play surface.
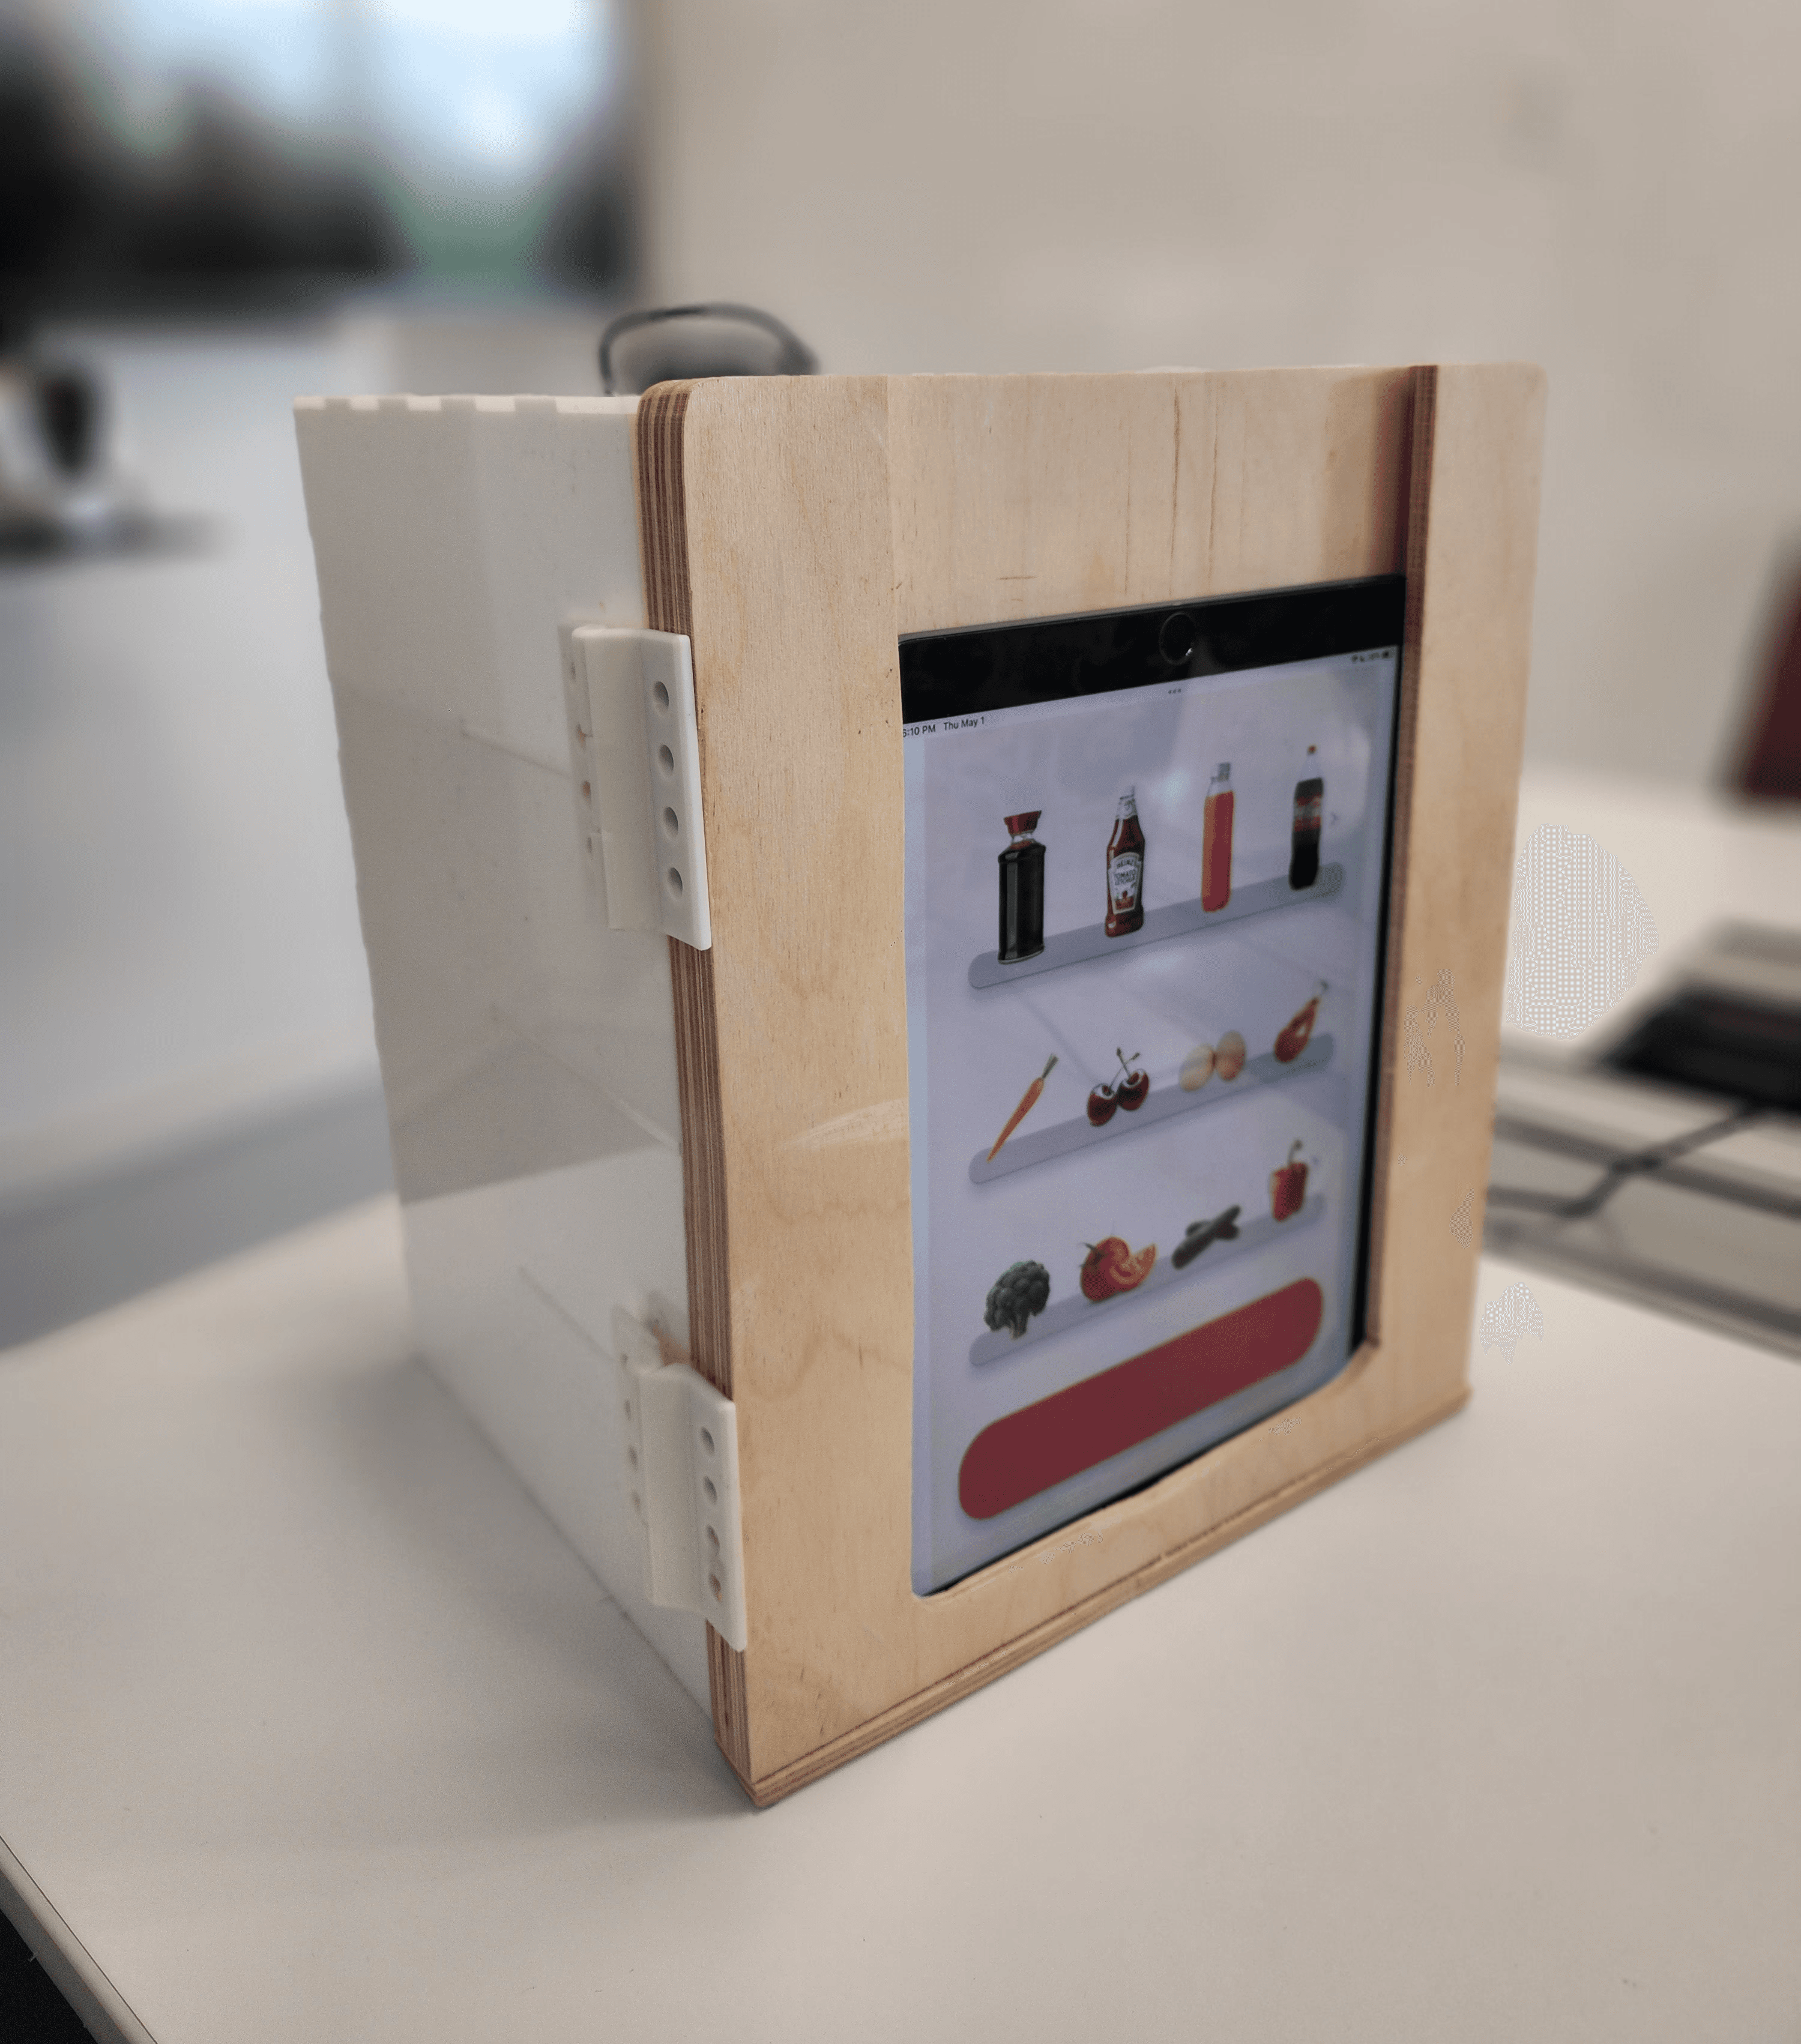
Fabrication
The physical board was built from layered acrylic and wood. I laser-cut the board layers to align the visual road pattern, detection zones, and internal wiring paths.
The board had three functional layers:
Road layer: The visible city grid and play surface.
Detection layer: Copper contact zones that read block placement.
Electronics base: Wiring, multiplexers, and Arduino connection.
I also prototyped the building blocks and accessories in SolidWorks, then iterated their geometry for grip, stacking, and consistent electrical contact. Since this was designed for kids, the components needed to feel sturdy, legible, and satisfying to use.
User Testing
We tested OurCity with peers and children in our target age range to evaluate engagement, collaboration, and empathy-driven decision-making.
What worked:
Kids immediately role-played. One child explained that a hospital was “for my grandma,” connecting the prompt to a real relationship.
Prompts sparked real discussion. Players debated where to place hospitals, power stations, parks, and transportation based on access and fairness.
Children thought spatially. One child argued that the power station should be near the hyperrail because “the hyperrail needs power.”
Physical building was intrinsically fun. Kids wanted to build tall, stack pieces, and test the limits of the system.
Character prompts changed decisions. After being asked why a senior center had a certain shape, one player changed the building to be one floor so residents would not need to walk upstairs.
What we improved:
More guided early prompts: The first round needed stronger direction so players had enough context to begin.
Better emotional specificity: Characters became more relatable when their needs were concrete and personal.
Improved block detection: We adjusted resistor spacing, copper tape placement, and contact pressure to improve sensing reliability.
More replayability: We added rotating storylines and varied resident needs so the game would not become repetitive.
The clearest testing insight was that children did not need a lecture about empathy. They needed a reason to care, a person to build for, and a system where their choices had visible consequences.
Outcome
OurCity became a working prototype of a tangible, collaborative learning experience.
The final system combined:
A physical city-building board
Stackable resistor-coded building blocks
Arduino-based sensing
Unity projection feedback
Character prompts and storylines
A collaborative play loop for empathy and spatial reasoning
The most successful part of the project was how naturally children began thinking like urban planners. They negotiated location, accessibility, visibility, transportation, and community needs through play.
Reflection
OurCity taught me how much work sits between a good interaction idea and a working physical experience.
The technology mattered, but the harder design problem was making the system feel intuitive, open-ended, and emotionally meaningful. The board had to detect blocks accurately, but it also had to invite kids to touch, build, argue, imagine, revise, and care.
I’m proud of this project because the hardware did not exist as a gimmick. It supported the larger experience: helping children make decisions for someone other than themselves.
For me, OurCity confirmed the kind of work I want to do next: building playful physical systems where engineering, storytelling, and human behavior all have to work together.
I focused on making the physical-digital interaction actually work.
My responsibilities included:
Designing the resistor-based block detection system
Prototyping circuits in TinkerCAD and on physical breadboards
Selecting resistor values with distinguishable analog outputs
Writing Arduino logic to poll board zones and identify block types
Designing block geometry for stacking, grip, and electrical contact
Fabricating the board using layered acrylic and wood
Debugging loose contacts, soldering failures, and inconsistent readings
Collaborating with our Unity developer to send live board data into the projected world
This project sat exactly at the intersection I care about: playful interaction, physical prototyping, hardware logic, and human-centered design.
Technical System
OurCity uses passive, resistor-coded blocks to identify what children place on the board.
Each block contains a resistor and copper tape contacts. When a block is placed on the board, it completes a circuit and produces a unique analog value. The board reads that value, maps it to a building ID, and sends the data to Unity.
The key design decision was to keep the blocks passive. There are no batteries, microcontrollers, or powered electronics inside the blocks. That made them cheaper, safer, more durable, and easier for children to handle.
The system used:
Passive resistors and copper tape contacts inside each block
Contact-based analog sensing through the board surface
CD4051 multiplexers to poll multiple board zones
Arduino logic to convert analog readings into building IDs
Serial communication to Unity for projected feedback
Resistor chaining logic to support stacked block configurations
This allowed the physical board to behave like a tangible input device for a digital world.
Hardware Iteration
The biggest technical challenge was reliability. The first circuit worked, but the physical connection was fragile. Small shifts in copper tape placement, loose wiring, contact pressure, or resistor spacing could create inconsistent readings.
I iterated the hardware in several ways:
Contact reliability: Added lips and adjusted copper tape placement so blocks pressed more consistently against the board.
Resistor spacing: Chose resistor values that created clearer separation between analog readings.
Block geometry: Refined block size, grip, and stackability so children could build easily without accidentally breaking the electrical connection.
Board structure: Built the board as a layered system with a road pattern, detection surface, and electronics base.
Debugging: Rebuilt failed connections, adjusted soldering, and tested each zone modularly before integration.
Although we only fully wired one section of the final board, the detection architecture was designed to scale across the full play surface.
Fabrication
The physical board was built from layered acrylic and wood. I laser-cut the board layers to align the visual road pattern, detection zones, and internal wiring paths.
The board had three functional layers:
Road layer: The visible city grid and play surface.
Detection layer: Copper contact zones that read block placement.
Electronics base: Wiring, multiplexers, and Arduino connection.
I also prototyped the building blocks and accessories in SolidWorks, then iterated their geometry for grip, stacking, and consistent electrical contact. Since this was designed for kids, the components needed to feel sturdy, legible, and satisfying to use.
User Testing
We tested OurCity with peers and children in our target age range to evaluate engagement, collaboration, and empathy-driven decision-making.
What worked:
Kids immediately role-played. One child explained that a hospital was “for my grandma,” connecting the prompt to a real relationship.
Prompts sparked real discussion. Players debated where to place hospitals, power stations, parks, and transportation based on access and fairness.
Children thought spatially. One child argued that the power station should be near the hyperrail because “the hyperrail needs power.”
Physical building was intrinsically fun. Kids wanted to build tall, stack pieces, and test the limits of the system.
Character prompts changed decisions. After being asked why a senior center had a certain shape, one player changed the building to be one floor so residents would not need to walk upstairs.
What we improved:
More guided early prompts: The first round needed stronger direction so players had enough context to begin.
Better emotional specificity: Characters became more relatable when their needs were concrete and personal.
Improved block detection: We adjusted resistor spacing, copper tape placement, and contact pressure to improve sensing reliability.
More replayability: We added rotating storylines and varied resident needs so the game would not become repetitive.
The clearest testing insight was that children did not need a lecture about empathy. They needed a reason to care, a person to build for, and a system where their choices had visible consequences.
Outcome
OurCity became a working prototype of a tangible, collaborative learning experience.
The final system combined:
A physical city-building board
Stackable resistor-coded building blocks
Arduino-based sensing
Unity projection feedback
Character prompts and storylines
A collaborative play loop for empathy and spatial reasoning
The most successful part of the project was how naturally children began thinking like urban planners. They negotiated location, accessibility, visibility, transportation, and community needs through play.
Reflection
OurCity taught me how much work sits between a good interaction idea and a working physical experience.
The technology mattered, but the harder design problem was making the system feel intuitive, open-ended, and emotionally meaningful. The board had to detect blocks accurately, but it also had to invite kids to touch, build, argue, imagine, revise, and care.
I’m proud of this project because the hardware did not exist as a gimmick. It supported the larger experience: helping children make decisions for someone other than themselves.
For me, OurCity confirmed the kind of work I want to do next: building playful physical systems where engineering, storytelling, and human behavior all have to work together.
Confirm Linear Actuator Reliability
The first step was confirming that a linear actuator could reliably crush a water bottle. I wired a 200 lbf actuator through a breadboard and 3-way switch, mounted it to scrap PVC and wood, and tested it with empty bottles—some with caps, some without, in various shapes. It worked. That early success gave us confidence to move forward.
The first step was confirming that a linear actuator could reliably crush a water bottle. I wired a 200 lbf actuator through a breadboard and 3-way switch, mounted it to scrap PVC and wood, and tested it with empty bottles—some with caps, some without, in various shapes. It worked. That early success gave us confidence to move forward.


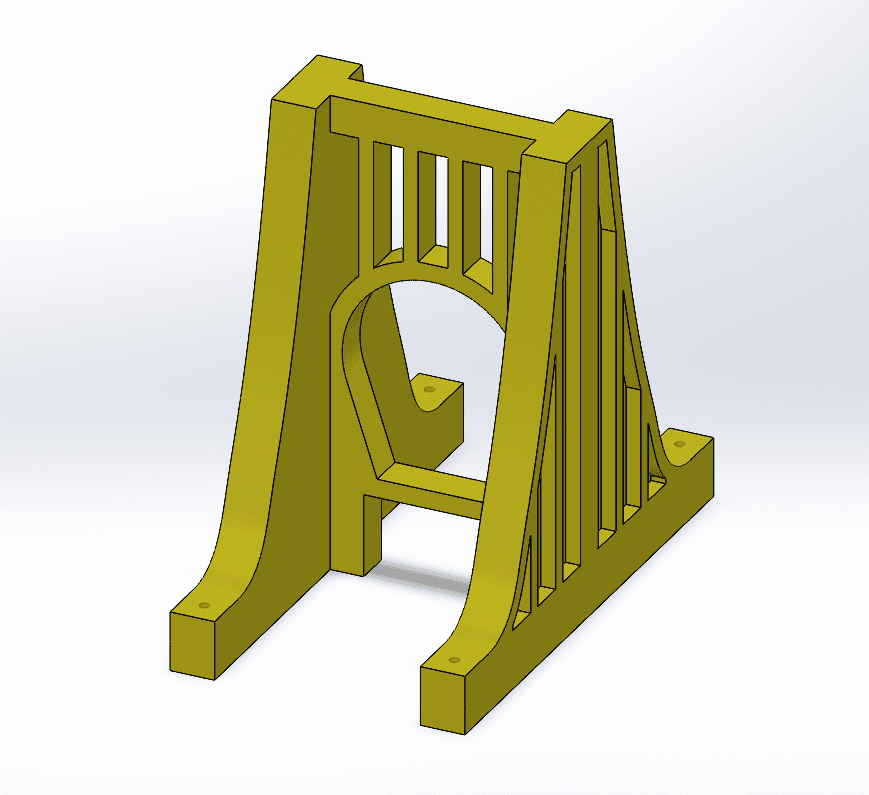
Iteration with CAD & FEA
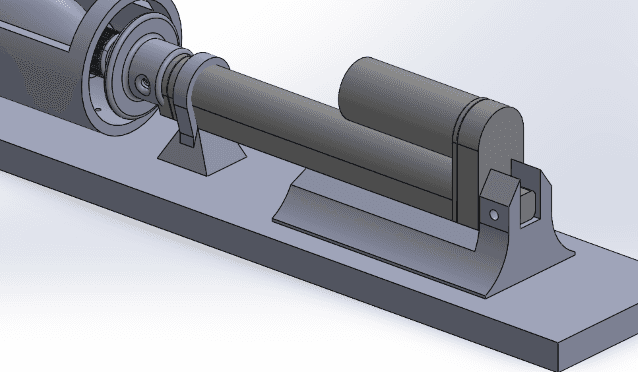
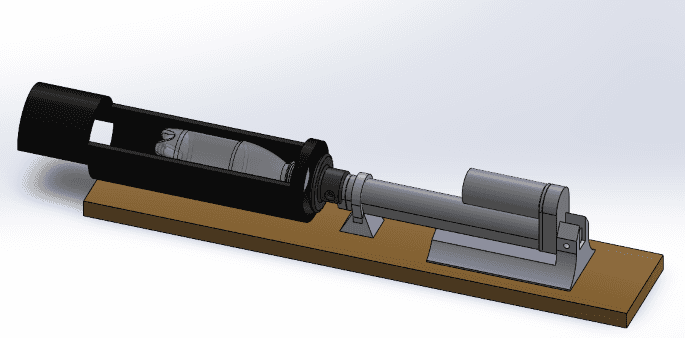
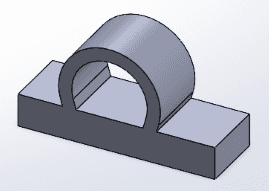
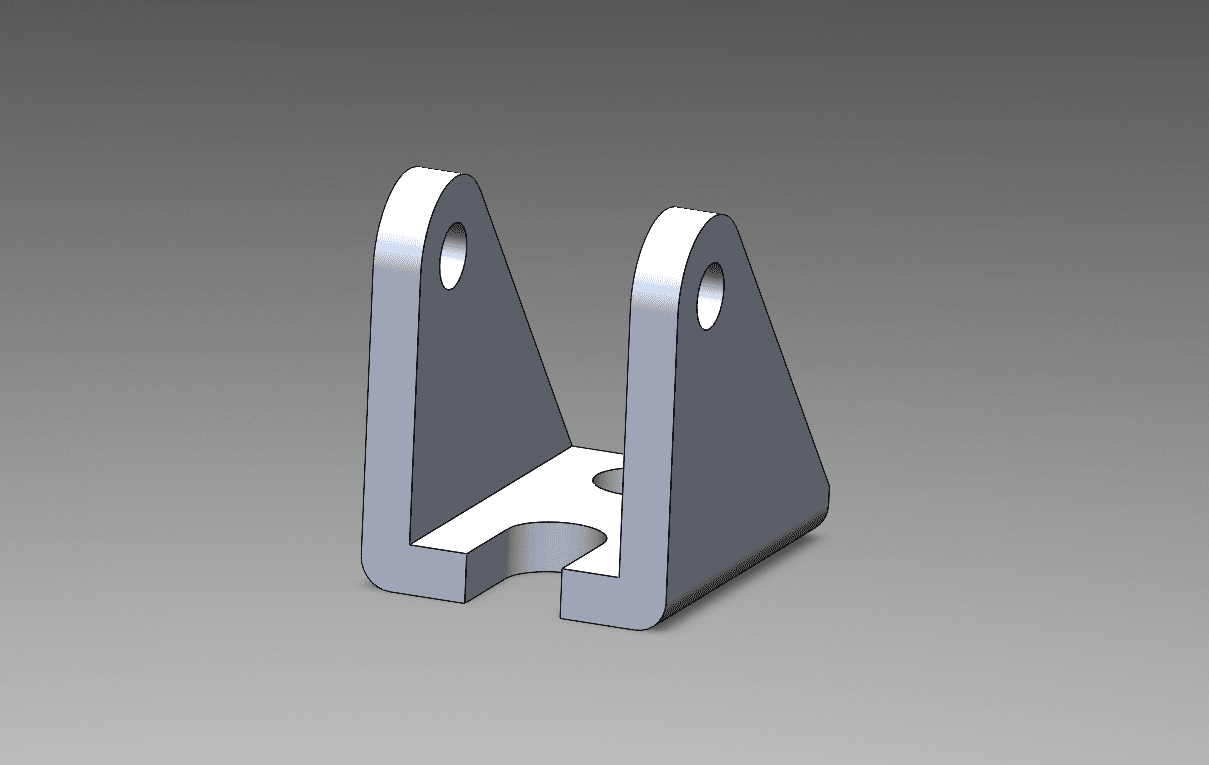
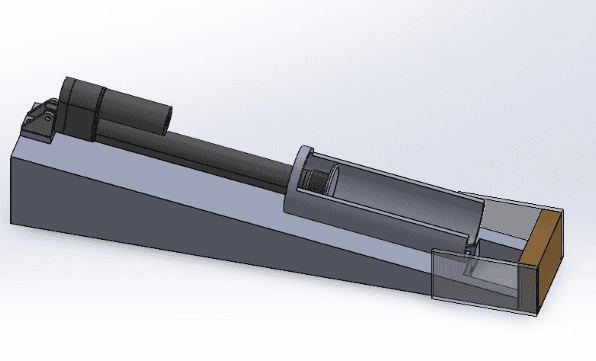
I transitioned to CAD to model the actuator mount, bottle path, and enclosure. I went through several iterations of the actuator mount specifically, refining hole placements, fastener clearances, and bracket dimensions to improve alignment and rigidity. If the actuator wasn't sitting flush or started to flex under load, I updated the CAD, re-cut parts, and remounted them in the shop to get it right. The structure had to match the actuator's stroke and allow easy fabrication with the shop tools and materials available to us.
I transitioned to CAD to model the actuator mount, bottle path, and enclosure. I went through several iterations of the actuator mount specifically, refining hole placements, fastener clearances, and bracket dimensions to improve alignment and rigidity. If the actuator wasn't sitting flush or started to flex under load, I updated the CAD, re-cut parts, and remounted them in the shop to get it right. The structure had to match the actuator's stroke and allow easy fabrication with the shop tools and materials available to us.


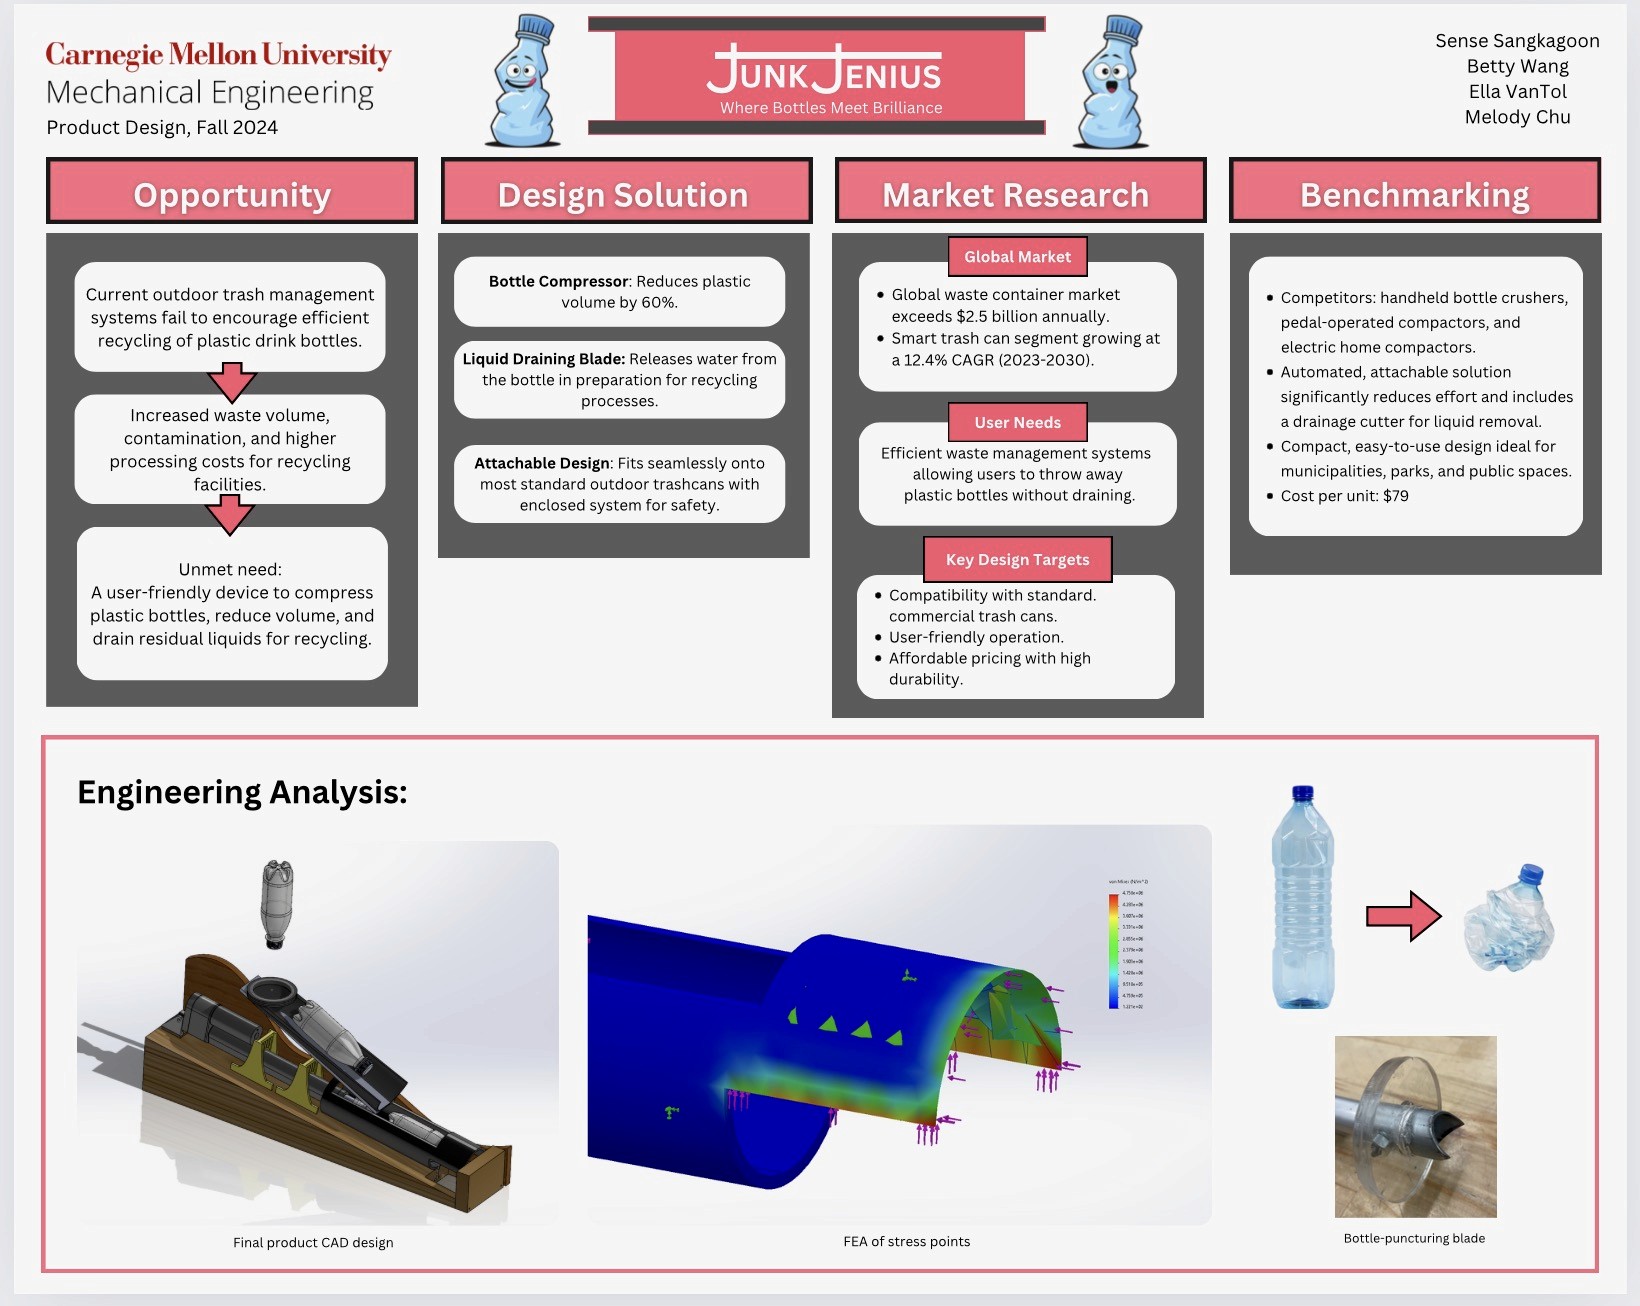
Validating Design with Stress Analysis & FEA
Validating Design with Stress Analysis & FEA


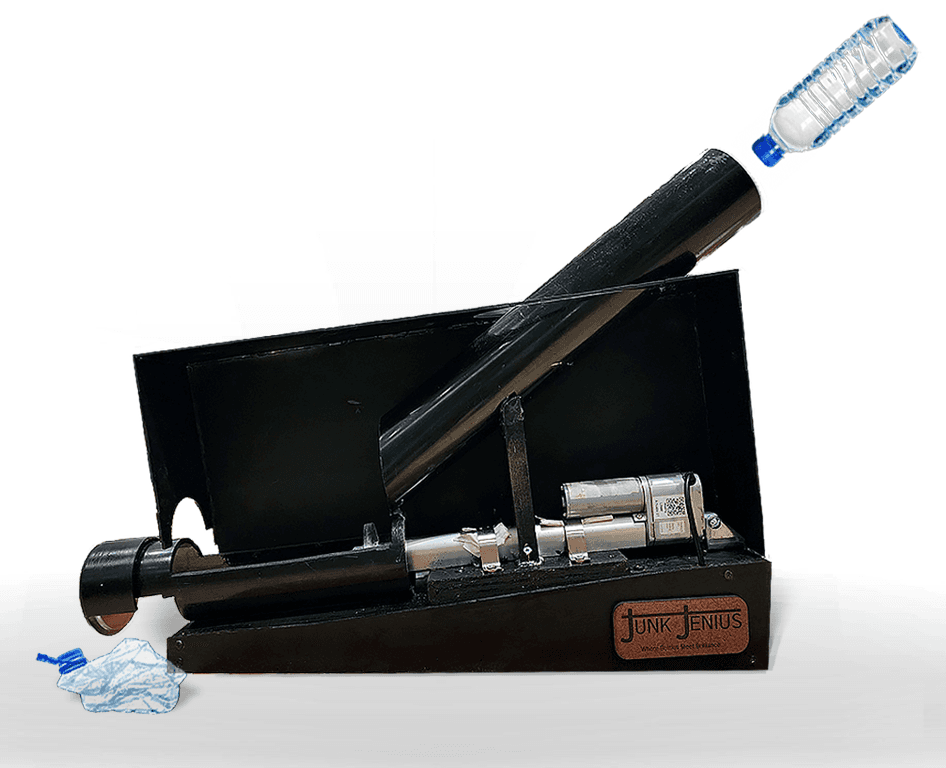
Machine Shop Fabrication
I built nearly everything by hand in the woodshop: cutting the PVC chute, assembling the frame from acrylic and wood, laser-cutting panels, and aligning parts using clamps and jigs. I added a slanted acrylic drainage ramp that directed liquid toward a filter bin.
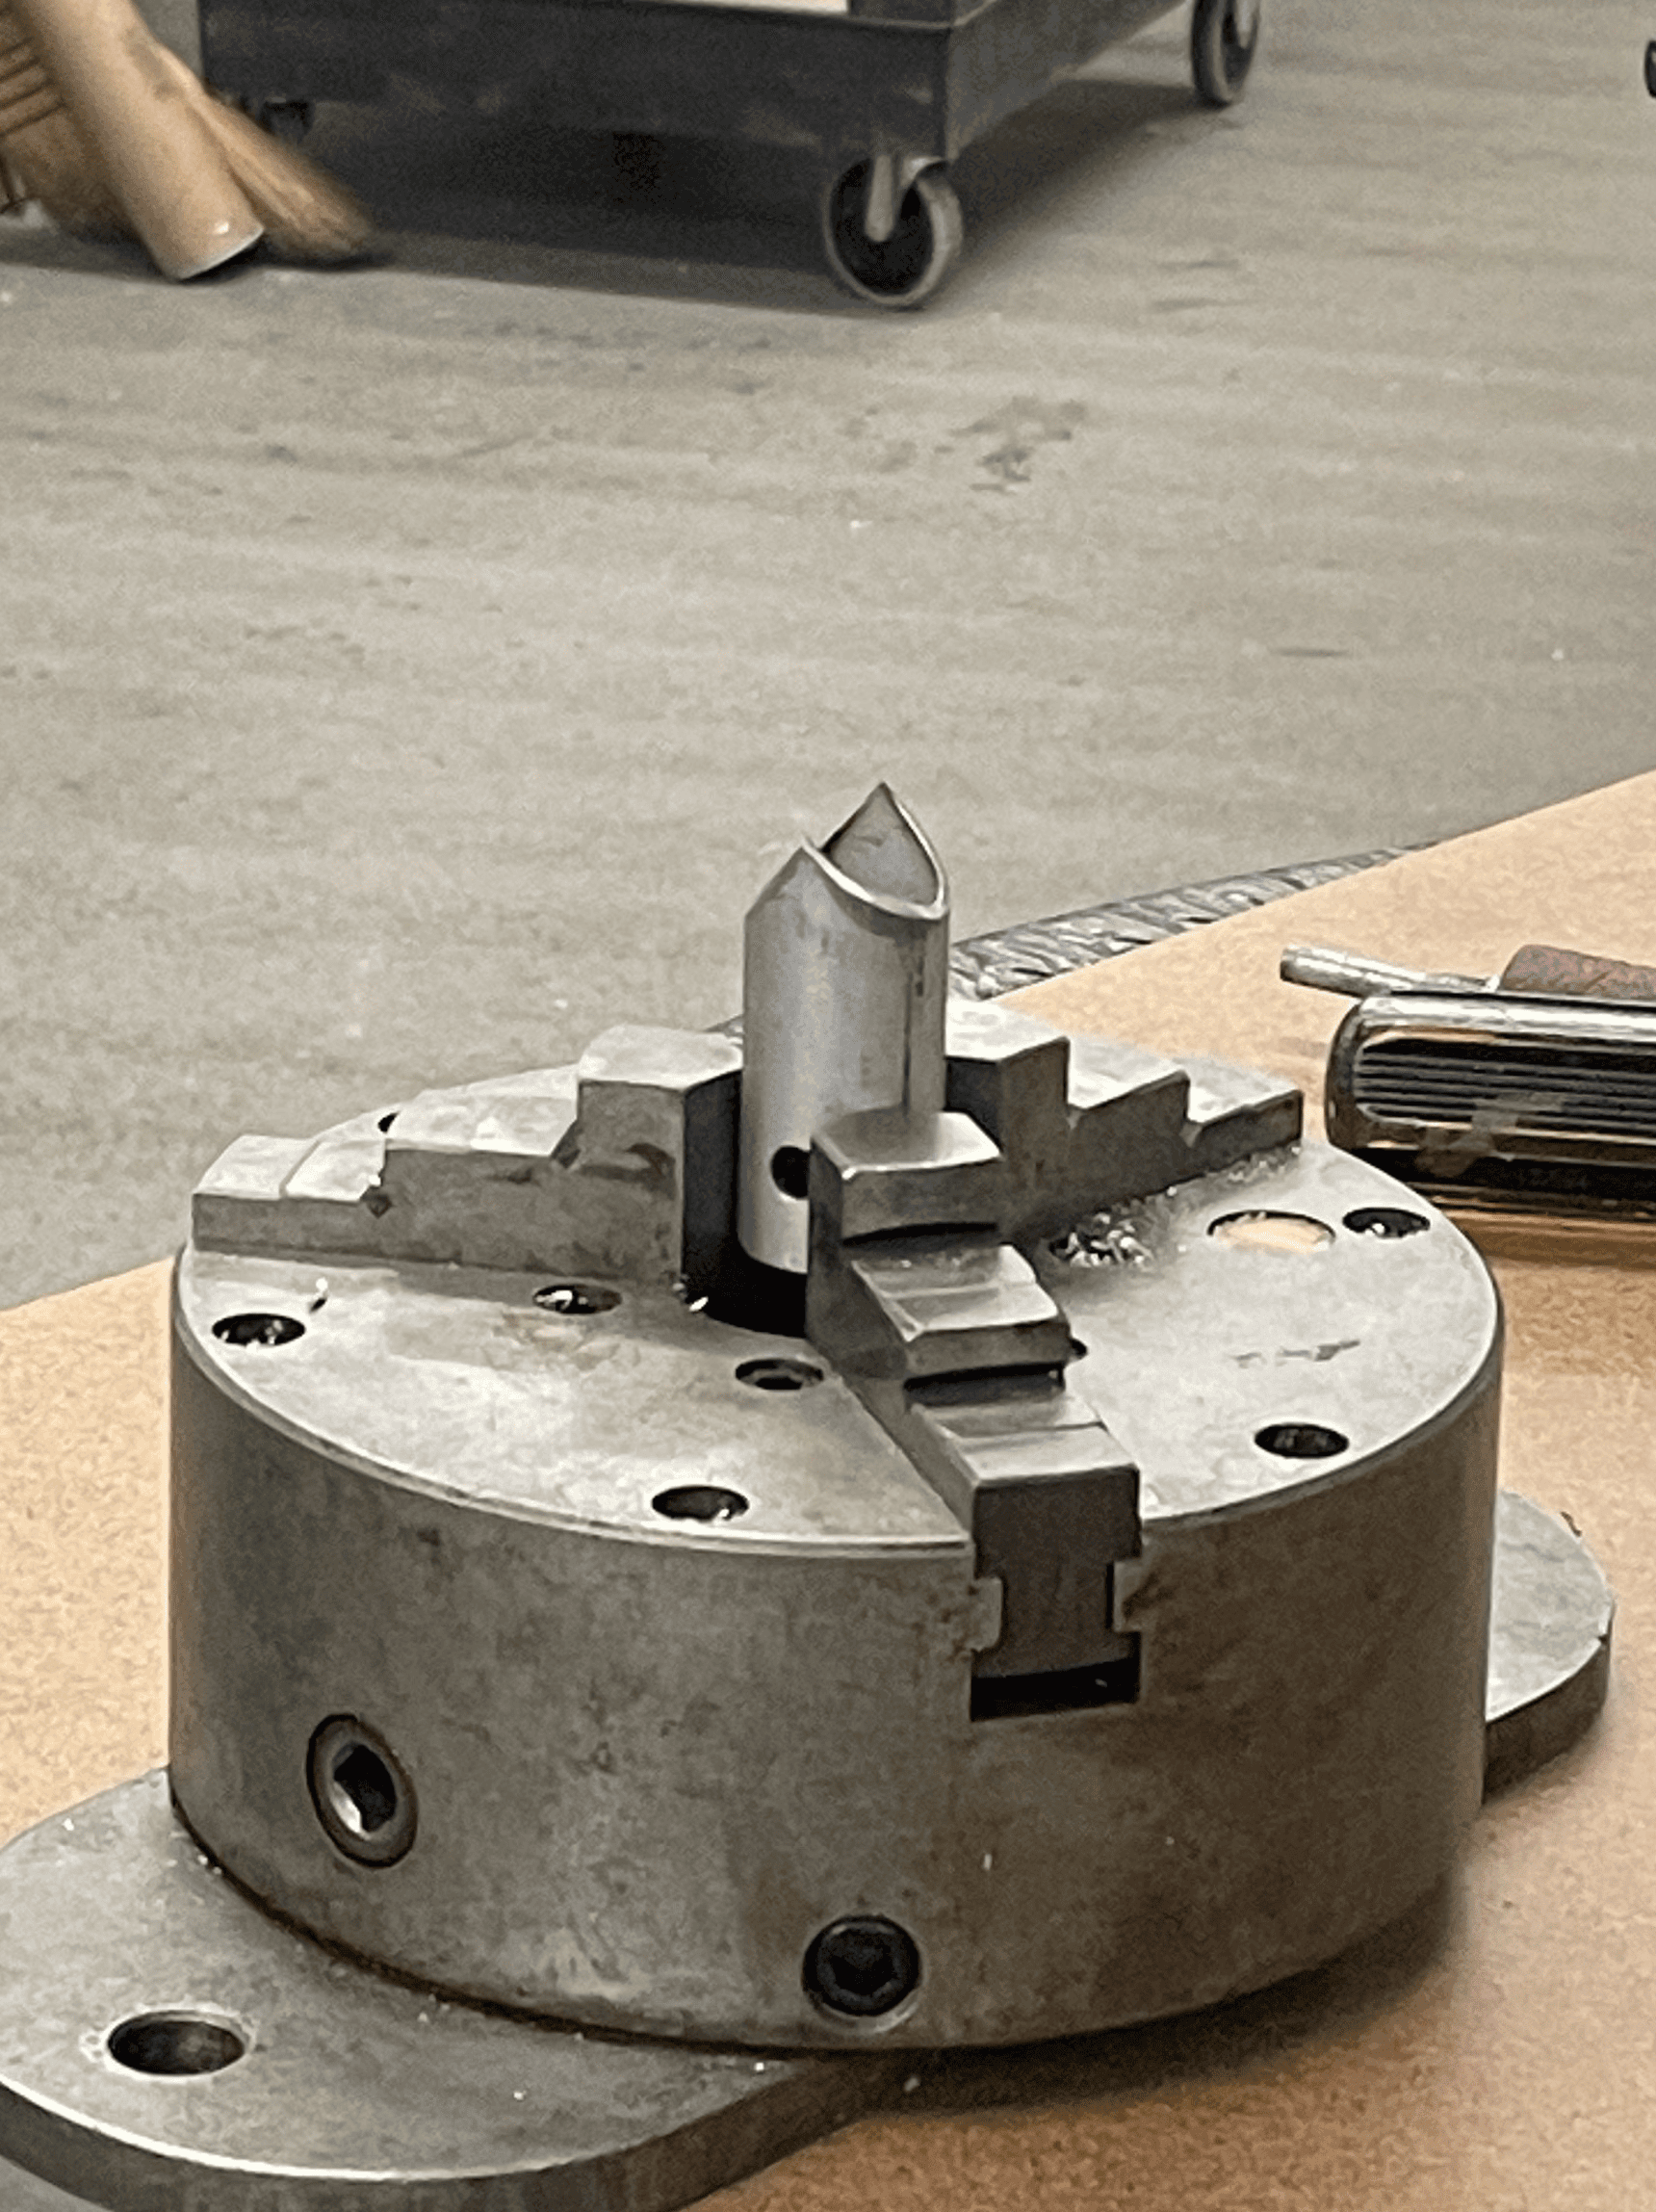
The blade was machined out of stainless steel. I designed its mounting geometry, installed it, and iterated the positioning and pierce angle through testing. I revised the CAD multiple times to adjust hole placements and support dimensions, returning to the shop to machine or re-cut parts as needed.
I built nearly everything by hand in the woodshop: cutting the PVC chute, assembling the frame from acrylic and wood, laser-cutting panels, and aligning parts using clamps and jigs. I added a slanted acrylic drainage ramp that directed liquid toward a filter bin.
The blade was machined out of stainless steel. I designed its mounting geometry, installed it, and iterated the positioning and pierce angle through testing. I revised the CAD multiple times to adjust hole placements and support dimensions, returning to the shop to machine or re-cut parts as needed.
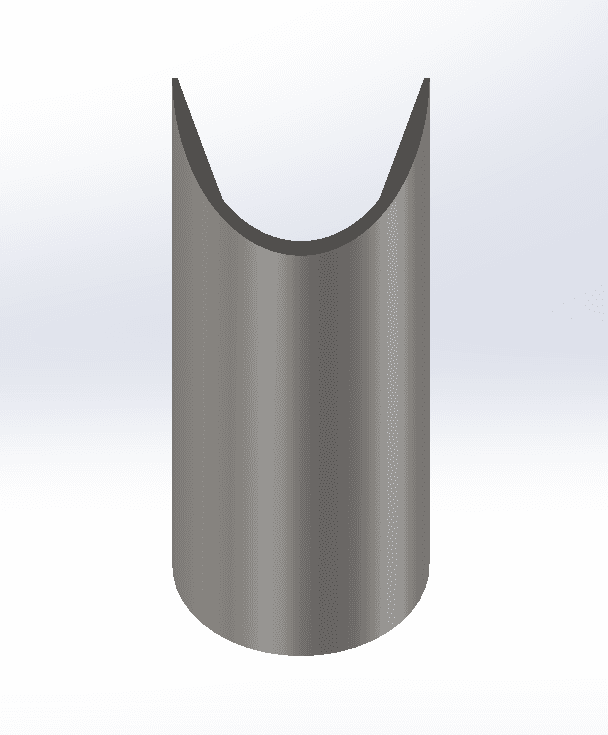

custom blade geometry designed to pierce bottle without getting stuck

all components were hand fabricated and assembled in machine shop
I handled all fitting, fasteners, and assembly, adapting in real time when parts didn’t align. If holes were off, I re-drilled them. If the chute sagged, I reinforced it. Every part was hand-fit, and the entire system was built from scratch and refined through testing.
We validated:
Reliable crushing for standard 16.9 oz bottles
No liquid leaks due to slanted ramp and filter bin
Smooth one-button interaction
Playtesting & Feedback
Pain Points:
Pain Points:
Unintuitive - Confusing interaction model (too many levers)
Unintuitive - Confusing interaction model (too many levers)
Fragile - Key mechanisms broke after 48 hours of normal use
Fragile - Key mechanisms broke after 48 hours of normal use
Unhelpful - Manual operation same efficacy as using hands
Unhelpful - Manual operation same efficacy as using hands
—
User Likes:
User Likes:
Interactive/Fun - The satisfaction of crushing something "I wanna try!"
Interactive/Fun - The satisfaction of crushing something "I wanna try!"
Interactive/Fun - The satisfaction of crushing something "I wanna try!"
Hygienic - Not having to touch the trash
Hygienic - Not having to touch the trash
💡 Key insight - Recycling needs to be automatic, durable, and fun to use.
User Needs
Satistying to watch
Satistying to watch
Easy & Intuitive Use - 1 button operation
Easy & Intuitive Use - 1 button operation
Durable
Durable
Automatic
Automatic
Drain leftover fluids
Drain leftover fluids
Ideation - Exploring our Options

Brainstorming improvements for current trash compactors and waste management
Crushing Mechanism
After confirming our problem space and user needs, we explored different mechanical approaches to the crushing mechanism. Options included a manual lever, cam system, and motorized linkage, but after evaluating cost, force output, and ease of integration, we determined that a linear actuator would give us the best balance of performance and simplicity. It was strong enough to crush bottles, relatively affordable, and easy to source.
After confirming our problem space and user needs, we explored different mechanical approaches to the crushing mechanism. Options included a manual lever, cam system, and motorized linkage, but after evaluating cost, force output, and ease of integration, we determined that a linear actuator would give us the best balance of performance and simplicity. It was strong enough to crush bottles, relatively affordable, and easy to source.

linkage mechanism

cam system
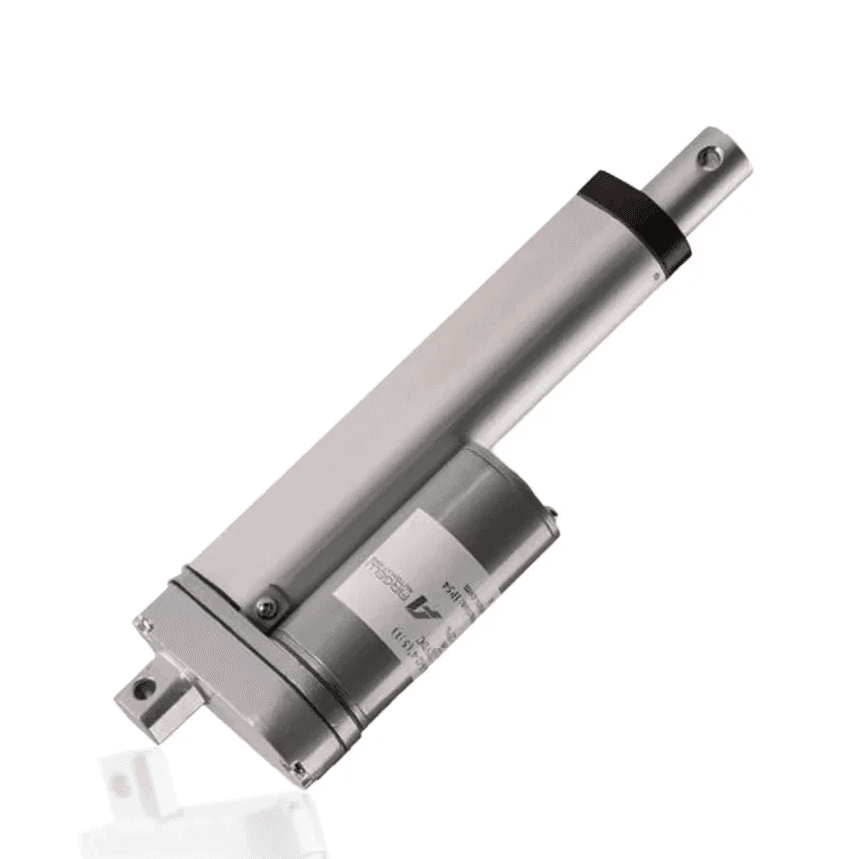
off-the-shelf linear actuator
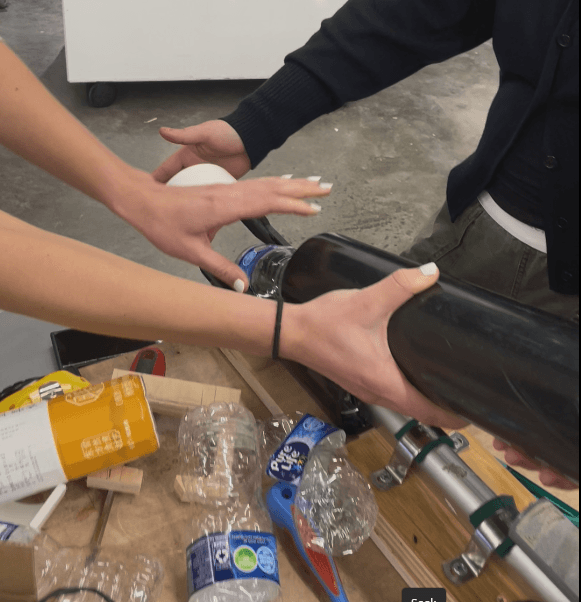
To test feasibility early, I built a rough proof-of-concept using a 200 lbf actuator wired to a breadboard and mounted in PVC. It worked reliably, confirming our direction.
To test feasibility early, I built a rough proof-of-concept using a 200 lbf actuator wired to a breadboard and mounted in PVC. It worked reliably, confirming our direction.

Proof of concept using linear actuator - successfully crushes bottle!
Lo-Fi Prototyping for System Configuration
Next, we tackled layout. Our team debated vertical vs. horizontal configurations. I quickly created CAD mockups and cardboard prototypes of both to test ergonomics and drainage. We chose a slanted horizontal layout, which:
Allowed gravity-assisted drainage
Aligned better with actuator motion
Made bottle insertion and visibility easier
This decision became the foundation for our mechanical structure and user-facing interface.
Sketching out the entire user process for each layout configuration:


using lo-fi prototypes to test layout feasibility:
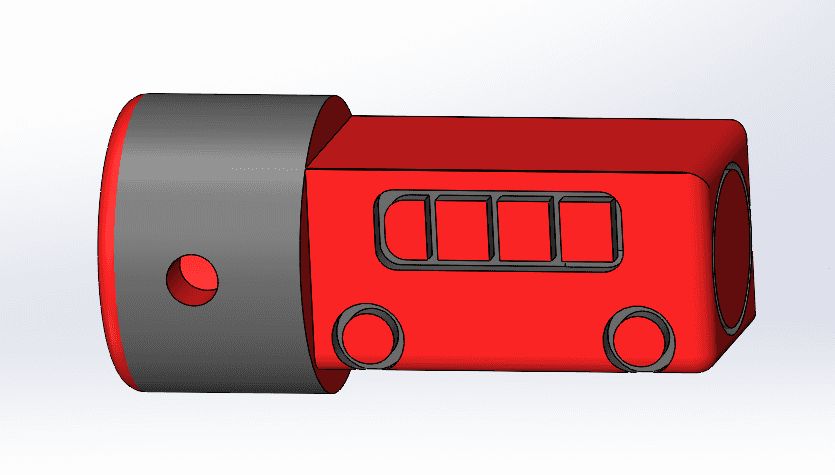
Visual & Emotional Design - Pittsburgh-Made
While our prototype focused on functionality, I additionally designed and CAD-modeled a playful, Pittsburgh-inspired aesthetic for a future version:
Blade housing as a red bus (like a snowplow)
Actuator rails styled after city bridges
Outer frame mimicking Pittsburgh’s hilly skyline
These features weren’t fabricated, but they helped us imagine how a utilitarian object could feel emotionally resonant and locally relevant.


Connect to Content
Add layers or components to swipe between.
Results
- Successfully cut, drained, and crushed plastic bottles in live demos
- Built for safety: all moving parts enclosed, momentary switch prevents misuse
- Designed to fit into real public spaces, especially campus recycling systems
- Received strong interest for continued development and deployment


jjj
Reflection
This was my capstone project, and one of the most rewarding experiences of my time at CMU. I loved getting to work on something tangible, solve engineering problems hands-on, and see users light up when they interacted with the final product.
It reminded me that good design isn’t just about performance—it’s about clarity, ease, and emotional impact. If we make it intuitive, people will use it. If we make it delightful, they’ll want to.